Pawex Docs
Pawex HTML template
Created: 19.06.2020
By: MWTemplates
Email: support@modernwebtemplates.com
HowTo:
This template is a set of regular static HTML files. It has no any backend dashboard. To edit it you can use any HTML editor that you prefer. For example it could be Visual Studio Code, Sublime Text, Notepad++, Adobe Dreamweaver or any other
After modifying template HTML files you should upload your files and folders by using FTP or any other file manager on your hosting server.
If you have any questions that are beyond the scope of this help file, please feel free to email us via my user page contact form.
Thank you for purchasing our Template. If you have any questions that are beyond the scope of this help file, please feel free to email us via my user page contact form. Thanks so much!
Download Package Content
You can find the following folders in the download package
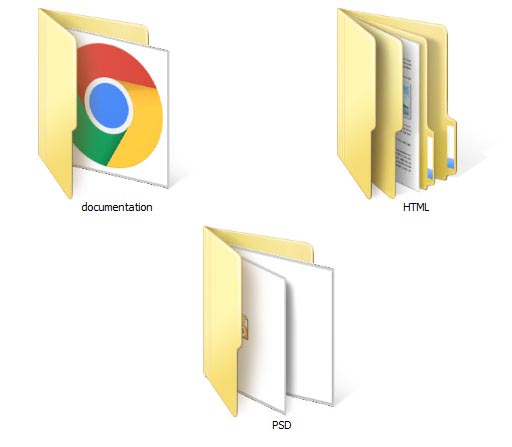
- "documentation" folder contains this documentation.
- "HTML" - folder contains actual template with all of HTML, JS and PHP files. It's content will be displayed below.
- "PSD" folder contains all of PSD files.
HTML folder content
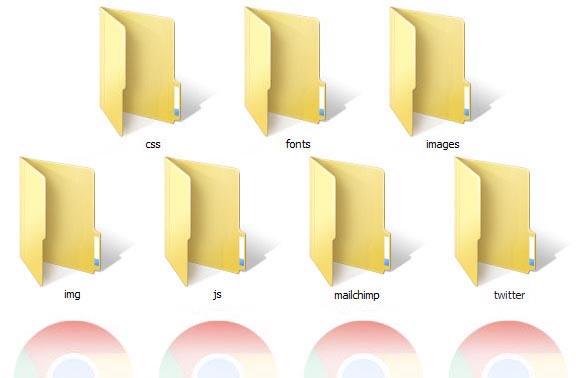
- "css" folder contains CSS files. You can find out more about CSS files in HTML Structure section of this documentation.
- "fonts" folder has all of the custom fonts that are used in this template, such as icon fonts, font awesome, social icons etc.
- "images" folder contains all of the images that are used on the template pages. It has several subfolders:
- "events" folder contains images for events page.
- "gallery" folder contains images for isotope carousel galleries and other subpages.
- "partners" folder contains images for partners carousel.
- "shop" folder contains images for shop pages.
- "team" folder contains photos of team members.
- "img" folder contains all of the images that are used in CSS files for template styling (such as patterns, preloader etc). It also contain "parallax" subfolder with background images for parallax sections.
- "js" folder contains javascript files that are used in this template. It has "vendor" subfolder that containss all of the thirdpart plugins and libs. Go to Sources and Credits section to get the list of the thirdpart libs and plugins.
- "mailchimp" folder contains PHP scripts for MailChimp subscribe widget.
- "twitter" folder contains JS and PHP scripts for Twitter widget.
HTML Structure
This HTML Template is based on Twitter Bootstrap v4. It is compatible with a IE11 browser and all other modern browsers.
It has several main section classes that may or may not be present on the page (depending on certain page). You can use it depending on your needs. They are:
- "ls" - light_section - section with white background.
- "ls ms" - light_section muted_section - section with light grey background.
- "ds" dark_section - section with dark grey background.
- "ds ms" - dark_section muted_section - section with dark background.
- "cs" - color_section - section with the main template color background.
Also there are some of predefined unique sections (class and id attributes) that you can use with classes above:
- "page_topline" class - contains some contact information, social icons etc.
- "page_toplogo" class - contains logo in various header layouts.
- "page_header" class - contains site Main Menu.
- "page_slider" class - contains homepage main slider.
- "page_map" class - contains google map.
- "page_title" class section - contains page title and site navigation (breadcrumbs).
- "page_content" class section - used for main content section.
- "page_footer" class section has footer widgets.
- "page_copyright" class section contains copyright information.
- "preloader" div element that is located at the bottom of HTML page is a page preloader. Remove it if you do not need a preloader on your pages.
CSS Files and Structure
There are several main CSS files in this HTML Template. They are located in "css" subfolder
CSS Libraries:
- bootstrap.min.css - is a standard Twitter Bootstrap v4 CSS file.
- animations.css - is a CSS animations library from justinaguilar.com
- font-awesome.css - is a font library from http://fontawesome.io/
Template CSS files:
- shop.css - CSS file contains all styles for shop WooCommerce ready pages.
- main.css file is a main template file. It contains all of the specific stylings for the pages.
The "main.css" file is separated into the following sections:
1. Common tags styles
2. Styled lists
3. Overrides for default Bootstrap components
4. jQuery plugins styles
- owl
- flexslider
- photoswipe
- piechart
- timetable
- totop
- countdown
5. Bootstrap Addons helpers styles for sections and elements
- horizontal
- vertical
- sections
- media_items
- buttons
6. Light background sections (.ls) styles
7. Dark background sections (.ds) styles
8. Color background sections (.cs) styles
9. Bootstrap Addons utility styles
- layout
- colors
- spacing
10. Shortcodes styles
- icon-box
- special-heading
- number-card
- price_table
- quote-item
- items-masonry
11. Widgets styles
- search_mailchimp
- nav_cat_arch_meta_pages
- calendar
- rss
- tag_cloud
- flickr
- instagram
- access_press
- twitter
- post_slider
- post_tabs
- post_2cols
12. Social icons styles
13. WordPress styles
14. Menu styles
15. Header styles
16. Side header styles
17. Intro section styles
18. Common sub-pages styles
19. Template specific sections styles
Template CSS files (main.css, shop.css - also has versions with number at the end of the name (ex. main2.css). This files contains same styles as original ones but with different predefined accent color (aka
Changing template layout
To change template layout from wide to boxed you need to do two things:
- add "boxed" class to div with ID "canvas" HTML element
- add "container" class to div with ID "box_wrapper"
Example:
<div id="canvas" class="boxed">
	<div id="box_wrapper" class="container">
		...
	</div>
</div>
To add pattern in boxed layout just add one of the following predefined CSS classes to div with ID "canvas" HTML element:
- pattern1
- pattern2
- pattern3
- pattern*
Example:
<div id="canvas" class="boxed pattern2">
	...
</div>
To add top and bottom margins for boxed version just add class "top-bottom-margins" for div with id "box_wrapper"
Example:
<div id="canvas" class="boxed">
	<div id="box_wrapper" class="container top-bottom-margins">
		...
	</div>
</div>
Changing the main color
If you want to change the main color for this template, just replace all instances of main color hex code with hex color value that you want inside the "main.css" file.
Also you can change "main.css" to "main2.css" or "main3.css" (also "shop2.css" ) in your HTML code inside "head" tag which are the same with the exception of predefined colors within it.
Example:
<link rel="stylesheet" href="css/main2.css">
<link rel="stylesheet" href="css/shop2.css">
<link rel="stylesheet" href="css/dashboard2.css">
Changing Light and Dark versions
You can change a class for any section inside "#box_wraper" div to change your template version from light to light grey or dark.
Available section classes are:
- ls - light background section
- ls ms - light section, muted section (light grey background)
- ds - darkgrey background section
- ds ms - dark muted section (dark background section)
- cs - color background section
Examples:
<section class="ls" id="content">
	...
</section>
You can change to:
<section class="ds ms" id="content">
	...
</section>
Changing page preloader
To change page preloader just replace preloader.gif file which is in img directory to any other GIF file.
JavaScript Files
Following files are located in "js" subfolder
Vendor Plugins: ("js/vendor" subfolder)
- modernizr-2.6.2.min.js detecting browser's features.
- jquery-3.3.1.min.js is a popular JavaScript library.
- bootstrap.bundle.js is a stantard Twitter Bootstrap library.
- respond.min.js is required for working Twitter Bootstrap v3 in older browsers.
- html5shiv.min.js adds HTML5 compatibility for older browsers.
- superfish.js is a script that enables a dropdown menu.
- hoverIntent.js is a component for superfish menu.
- jquery.flexslider-min.js is a jQuery plugin for the main and bottom sliders.
- jquery.isotope.min.js is a jQuery plugin for filtrable gallery.
- photoswipe.js is a JS plugin for displaying gallery content.
- jquery.ui.totop.js is a jQuery plugin for toTop button.
- jquery.easing.1.3.js is a jQuery plugin for different types of animation
- jquery.scrollTo.min.js and jquery.localScroll.min.js needed for smooth single page navigation.
- jquery.easypiechart.min.js is a jQuery plugin that uses the canvas element to render simple pie charts for single values.
- jquery.jflickrfeed.min.js plugin makes it easy to pull Flickr feeds and display them on your site.
- jquery.tweet.min.js plugin enables twitter widget on your site.
- owl.carousel.min.js is a jQuery carousel plugin for "partners" section
- jquery.parallax-1.1.3.js is used for parallax backgrounds.
- jquery.appear.js is used to determine whether the HTML element is inside the browser's viewport
- jquery.scrollbar.min.js is a jQuery plugin for custom scrollbar
- bootstrap-progressbar.min.js is used for animating Twitter Bootstrap progressbars
- jquery.countTo.js is used for teasers with counter
- jquery.cookie.js is used for store cookies information in the template
- spectragram.min.js is used for Instagram feed
- jquery.countdown.min.js is used for Coming Soon page
Template Scripts:
- main.js inits all the basic behavior for this template.
- switcher.js has a code for style switcher. Used only in demo.
All of JS files (except "main.js" and "switcher.js" ) are compressed in a single "compressed.js" file for best perfomance.
If you do not want to use "compressed.js" file, you can replace following code at the bottom of your page:
	<script src="js/compressed.js"></script>
	<script src="js/main.js"></script>
with this one:
<script src="js/vendor/jquery-3.3.1.min.js"></script>
<script src="js/vendor/bootstrap.bundle.min.js"></script>

<script src="js/vendor/affix.js"></script>
<script src="js/vendor/jquery.appear.js"></script>
<script src="js/vendor/jquery.cookie.js"></script>

<script src="js/vendor/jquery.easing.1.3.js"></script>
<script src="js/vendor/jquery.hoverIntent.js"></script>
<script src="js/vendor/superfish.js"></script>

<script src="js/vendor/bootstrap-progressbar.min.js"></script>
<script src="js/vendor/jquery.countdown.min.js"></script>
<script src="js/vendor/jquery.countTo.js"></script>
<script src="js/vendor/jquery.easypiechart.min.js"></script>
<script src="js/vendor/jquery.scrollbar.min.js"></script>
<script src="js/vendor/jquery.localScroll.min.js"></script>
<script src="js/vendor/jquery.scrollTo.min.js"></script>
<script src="js/vendor/jquery.ui.totop.js"></script>

<script src="js/vendor/jquery.parallax-1.1.3.js"></script>
<script src="js/vendor/isotope.pkgd.min.js"></script>
<script src="js/vendor/jquery.flexslider-min.js"></script>
<script src="js/vendor/owl.carousel.min.js"></script>

<script src="js/vendor/photoswipe.js"></script>
<script src="js/vendor/photoswipe-ui-default.min.js"></script>

<script src="js/vendor/jflickrfeed.min.js"></script>
<script src="js/vendor/spectragram.min.js"></script>
<script src="twitter/jquery.tweet.js"></script>
Setup Widgets and Shortcodes.
NOTE: You need PHP support on your hosting for use search, contact form, Twitter and MailChimp widgets.
Widgets and Shortcodes that need to be setup are:
- Google Map
- Flickr
- Subscribe
- Contact form
- Coming Soon countdown
- Search
To setup Google Map do the following:
First of all, you need to get a Google map API key by following this link:
Go to https://developers.google.com/maps/documentation/javascript/get-api-key#key,click button "GET A KEY" and follow instructions from Google.
Then scroll to the bottom of your contact page and find this code:
<script type="text/javascript" src="https://maps.googleapis.com/maps/api/js?key=XXXXXXXXXXXXXXXXX"></script>
and replace existing key with your API key.
To provide a Google map address, title, description and marker image do the following:
- Scroll to section with 'id="map"' or class="page_map" attribute and add or replace values inside your div with "marker" class.
- Put one or multiple "makrer" divs with following content:
- Put your map address inside div with "marker-address" class
- Put your map marker title inside div with "marker-title" class
- Put your map marker description inside div with "marker-description" class (html allowed)
- Put your image with "marker-icon" class for custom icon marker (optional)
<section class="page_map">
	<!-- marker description and marker icon goes here -->
	<div class="marker">
		<!-- address -->
		<div class="marker-address">sydney, australia, Liverpool street, 66</div>
		<!-- marker title -->
		<div class="marker-title">First Marker</div>
		<!-- marker description -->
		<div class="marker-description">
			<h3>Marker title</h3>
			<p>Marker description</p>
		</div>
		<!-- marker icon (optional) -->
		<img class="marker-icon" src="images/map_marker_icon.png" alt="">
	</div>
	<!-- .marker -->
</section>
To setup a Instagram Widget do the following:
- Register an application at Instagram Developers
- get a client_id and recieve an access_token.
- Edit your "main.js" file. Just replace ID with your Flickr ID
- Pass username if you are using getUserFeed method in your query
You can use "getUserFeed" or "getRecentTagged" methods to show your photos:
// Instagram widget
var Spectra = {
instaToken: 'YOUR_TOKEN',
instaID: 'YOUR_ID',
init: function () {
jQuery.fn.spectragram.accessData = {
accessToken: this.instaToken,
clientID: this.instaID
};
//available methods: getUserFeed, getRecentTagged
jQuery('.instafeed').spectragram('getRecentTagged',{
max: 8,
//pass username if you are using getUserFeed method
query: 'grey',
wrapEachWith: ''
});
}
}
Spectra.init();
To setup a Flickr Widget do the following:
- Go to http://idgettr.com/ and search for your Flickr ID
- Edit your "main.js" file. Just replace ID with your Flickr ID
To setup a Twitter Widget do the follofing:
- Go to https://dev.twitter.com/apps and register a new application to receive Consumer Key, Consumer Secret Word, User Token and User Secret Word
- Edit lines from 27 to 36 of your "twitter/index.php" file. Place your secret keys and words onto the corresponding placeholders.
- Edit "number of tweets" and "username" in your "js/main.js" file.
- Delete cache xxx.json file in "twitter" folder if it exists.
To setup a MailChimp Subscribe form do the following:
Edit the "mailchimp/store-address.php" file:
Line 19: replace "your_apikey" with an API Key retrieved from here:
http://admin.mailchimp.com/account/api/
Line 23: replace "my_list_unique_id" with the List Unique Id obtained by going to: http://admin.mailchimp.com/lists/.
Click the "settings" link for the list - the Unique Id is at the bottom of that page.
To setup a Contact Form do the following:
- Edit lines from 7 to 22 of your "contact-form.php" file. Place your email and message text.
To setup a Coming Soon counter on "comingsoon" page do the following:
- Open your "js/main.js" in your favorite code editor.
- Find following line of code:
-
jQuery('#comingsoon-countdown').countdown({until: demoDate});
- Replace "demoDate" with "new Date(VALUE);":
-
jQuery('#comingsoon-countdown').countdown({until: new Date(VALUE)});
- "VALUE" is a string ou number in milliseconds. Read more about date format:
-
JavaScript Date documentation
Online JavaScript date converter
To setup a Serch widged do the following:
- Edit lines from 1 to 7 of your "search.php" file. Place your message text at appropriate variables.
Setup Animation for any HTML elements
To set up animation for the single element, just add class "animate", attributes "data-animation" with this class, and "data-delay" with number in milliseconds to any HTML element and you're done.
Available values for "data-animation" attribute:
- fadeIn
- fadeInLeft
- fadeInUp
- fadeInRight
- fadeInDown
- fadeInUpBig
- fadeInDownBig
- fadeInLeftBig
- fadeInRightBig
- slideRight
- slideUp
- slideLeft
- slideInDown
- slideInLeft
- slideInRight
- expandUp
- slideExpandUp
- expandOpen
- bigEntrance
- hatch
- tossing
- pulse
- floating
- bounce
- pullUp
- pullDown
- stretchLeft
- stretchRight
- moveFromLeft
Setup Dev Environment
You can find source SCSS files in your scss folder. It contains source files for your CSS styles, that located in your css folder.
Also you can find Bootstrap source SCSS files in your scss_bootstrap folder. It contains source files for css/bootstrap.min.css file.
Also there are gulpfile.js and package.json files that you can use for customization of your template.
To compile SCSS files first of all you need to install NodeJS if you has not install it before.
Than you need to install gulp by typing following code in your console:
npm install --global gulp-cli
After that navigate to your project folder and install all developer dependensies with following command:
npm i
Finally run your project by typing:
gulp
Credits and Sources
As we mentioned earlier, we used Twitter Bootstrap v4 as CSS framework and HTML5 Boilerplate for this template.
This template has the following PSD files:
1.1_homepage.psd
1.2_homeblocks.psd
2.1_about.psd
2.2_404.psd
2.3_faq.psd
3.1_gallery.psd
3.2_price.psd
3.3_team.psd
3.4_team_member.psd
3.5_appointment.psd
4.1_services.psd
4.2_service page.psd
4.3_careers.psd
5.1_blog.psd
5.2_post.psd
6.1_contact.psd
7.1_widgets.psd
7.2_elements.psd
7.3_typography.psd
Following images are used in this template:
https://shutterstock.com/image-photo/132818777
https://shutterstock.com/image-photo/140338651
https://shutterstock.com/image-photo/265147631
https://shutterstock.com/image-photo/303618548
https://shutterstock.com/image-photo/333000893
https://shutterstock.com/image-photo/439433326
https://shutterstock.com/image-photo/446557834
https://shutterstock.com/image-photo/446557840
https://shutterstock.com/image-photo/458236126
https://shutterstock.com/image-photo/493767232
https://shutterstock.com/image-photo/516235426
https://shutterstock.com/image-photo/640005220
https://shutterstock.com/image-photo/674836288
https://shutterstock.com/image-photo/697602451
https://shutterstock.com/image-photo/715061974
https://shutterstock.com/image-photo/746302243
https://shutterstock.com/image-photo/752511124
https://shutterstock.com/image-photo/1043571091
https://shutterstock.com/image-photo/1048539986
https://shutterstock.com/image-photo/1049229782
Images
- shutterstock.com
- depositphotos.com
- danielezedda.com
- foodiesfeed.com
- gratisography.com
- magdeleine.co
- picjumbo.com
- picography.co
- unsplash.com
- freepsdfiles.net
- free-logo-design.net
NOTE: The images used in the template are not included in the main download file, they are only for the preview purpose.
Fonts:
- http://www.google.com/fonts/ - Google WebFonts
- https://github.com/h-ibaldo/Raleway_Fixed_Numerals - Raleway with fixed Numerals
- http://fontawesome.io/ - Font Awesome
Template Scripts
- modernizr-2.6.2.min.js detecting browser's features.
- jquery-3.3.1.min.js is a popular JavaScript library.
- bootstrap.bundle.js is a stantard Twitter Bootstrap library.
- respond.min.js is required for working Twitter Bootstrap v3 in older browsers.
- html5shiv.min.js adds HTML5 compatibility for older browsers.
- superfish.js is a script that enables a dropdown menu.
- hoverIntent.js is a component for superfish menu.
- jquery.flexslider-min.js is a jQuery plugin for the main and bottom sliders.
- jquery.isotope.min.js is a jQuery plugin for filtrable gallery.
- photoswipe.js is a JS plugin for displaying gallery content.
- jquery.ui.totop.js is a jQuery plugin for toTop button.
- jquery.easing.1.3.js is a jQuery plugin for different types of animation
- jquery.scrollTo.min.js and jquery.localScroll.min.js needed for smooth single page navigation.
- jquery.easypiechart.min.js is a jQuery plugin that uses the canvas element to render simple pie charts for single values.
- jquery.jflickrfeed.min.js plugin makes it easy to pull Flickr feeds and display them on your site.
- jquery.tweet.min.js plugin enables twitter widget on your site.
- owl.carousel.min.js is a jQuery carousel plugin for "partners" section
- jquery.parallax-1.1.3.js is used for parallax backgrounds.
- jquery.appear.js is used to determine whether the HTML element is inside the browser's viewport
- jquery.scrollbar.min.js is a jQuery plugin for custom scrollbar
- bootstrap-progressbar.min.js is used for animating Twitter Bootstrap progressbars
- jquery.countTo.js is used for teasers with counter
- jquery.cookie.js is used for store cookies information in the template
- spectragram.min.js is used for Instagram feed
- jquery.countdown.min.js is used for Coming Soon page
NOTE: The images used in the template are not included in the main download file, they are only for the preview purpose.
© 2020 Pawex Inc.s